Reaching out to your leads
Now that you've opened your search and checked your templates, it's time to start receiving your leads, and more importantly, to start reaching out.
Your first leads
When you get your first leads, there are three simple steps to follow:
- Review
- Provide feedback
- Contact
But, before we go there, a quick look at what a lead actually looks like.
Anatomy of a lead
When your first leads are ready you'll receive an email from us to let you know. From this email you can click through to your search. Alternatively, you can go to your dashboard and click into your search from there.
Once there, you'll be able to review your leads. Each lead is represented by a card that shows the following:
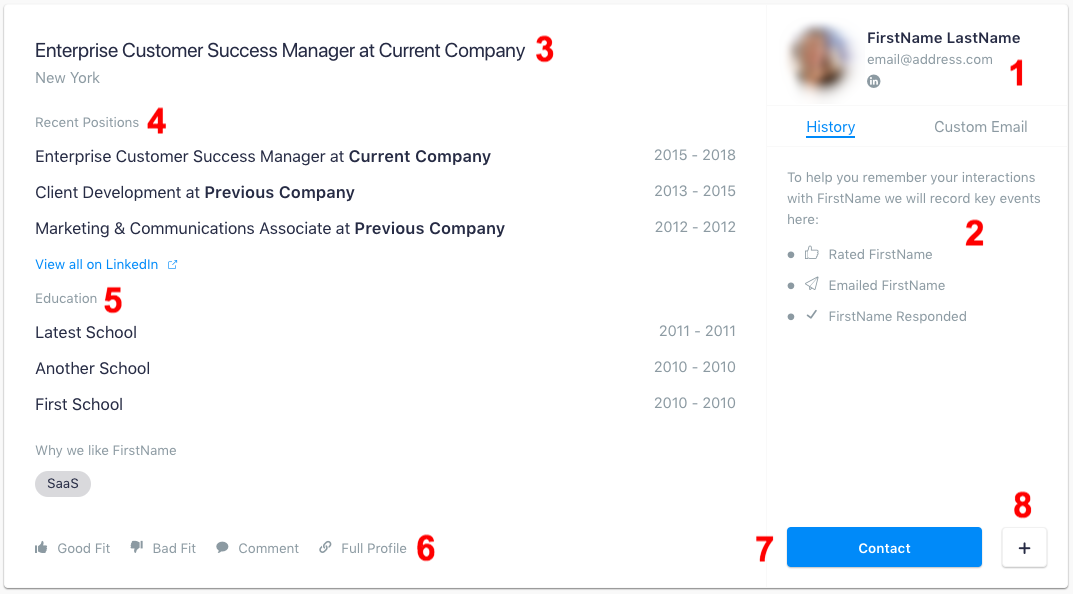
- Name, Email, Social Networks
- History
- Current title and company
- Work History
- Education
- Review tools
- Contact button
- More options
Now, let's start reviewing some leads.
Review your lead
The first step when looking at a lead is to review it (at least while we're at the start of a campaign, more on that later). Often, the work history shown on the card is enough to determine whether you'd like to talk to them. But, if you'd like more info, you can always click through to their LinkedIn profile, or look at their full profile by clicking on the link at the bottom of the page.
Providing feedback
Having reviewed the lead, the next step is to provide us feedback. This is particularly useful at the start of a campaign as it helps us to quickly hone in on your ideal profile. But, it will also help maintain the accuracy of your leads later when the search is fully automated.
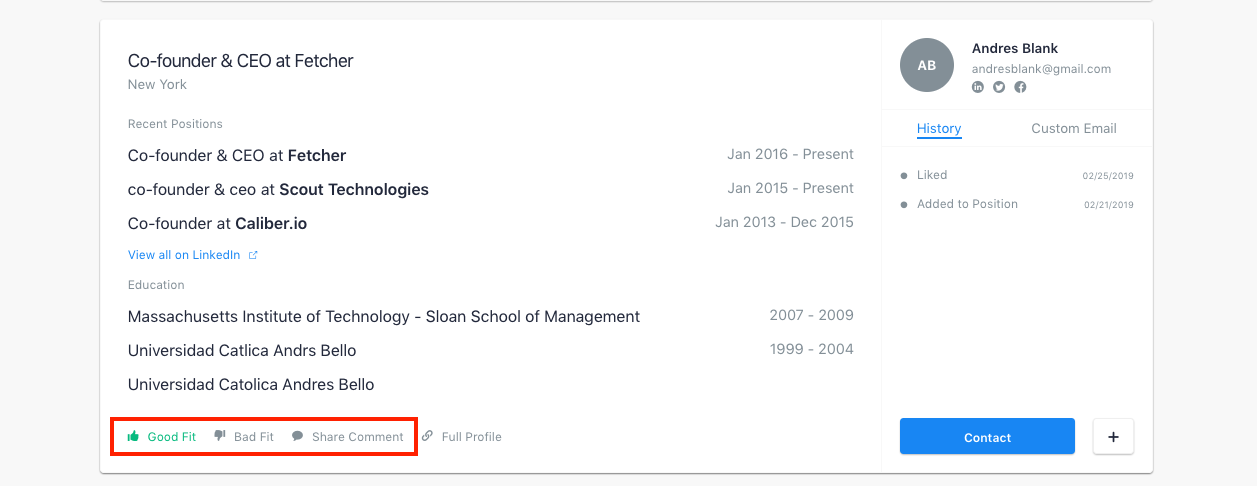
To get started, first indicate whether someone is a good or a bad fit by clicking the thumbs up or thumbs down in the bottom left corner of the lead card. Once you decide if the potential candidate is a fit or not you can provide a little bit of color as to why. The best way to do so is to click on the "Share Comment" link.
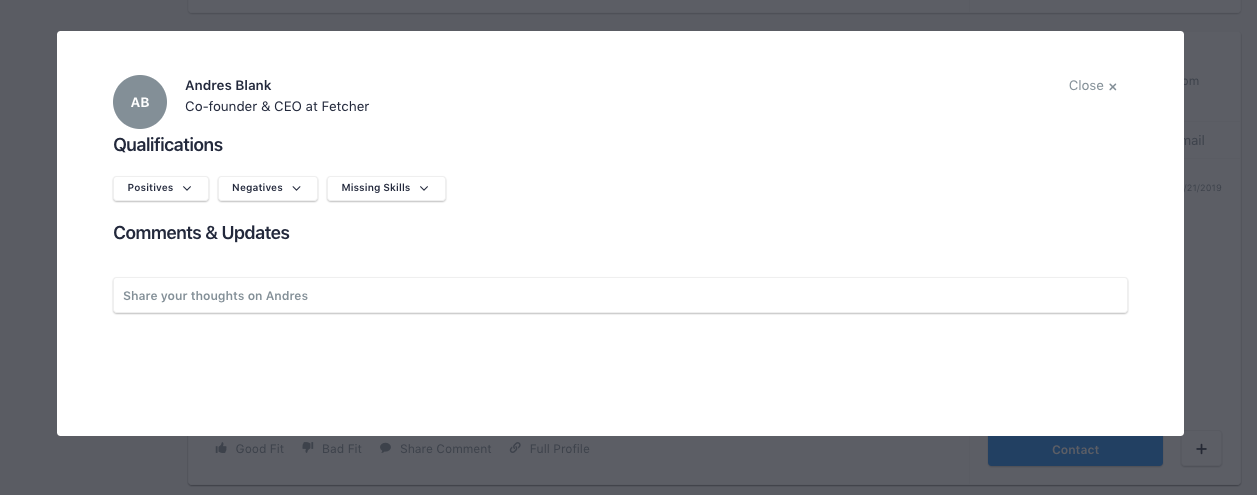
From the "Share Comment" modal you can use the available tags to describe the lead's aptitude. Using these tags will directly inform the AI for your next batch.
If a tag doesn't fit, or you would like to elaborate on it, you add a comment in the Comment & Updates section. Comments included here will go directly to our team for application in going forward.
Contacting the lead
The final step is to schedule the lead for the outreach campaign. If you have auto-schedule enabled, this will have happened automatically, and rather than "Contact" the button will show the date your lead is scheduled to be contacted. If you have not automated your outreach, all you have to do is click "Contact" and your lead will be scheduled for the next sequence.
And that's all there's to it - you've successfully Fetchered!
More Options
Clicking on the plus will give you some more options:
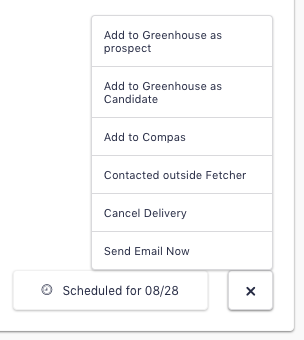
If you've connected your ATS you can send a lead over by clicking on the appropriate option. Then, once a lead is scheduled for outreach (which is the case in this illustration) you can cancel the delivery, or if you can't wait to talk to them, click on "Send Email Now".
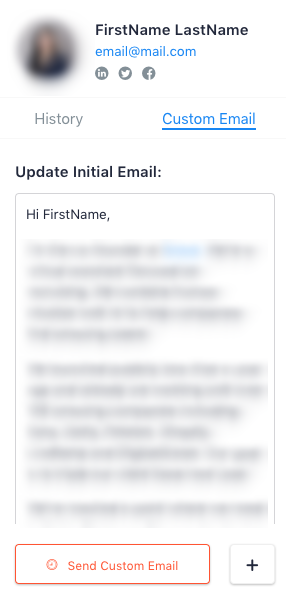
Custom emails
If there's anything in particular you want to highlight for a specific lead, you can do that by clicking on the "Custom Email" tab on the right side of the card. This will allow you to create an email just for one person. When done, click on "Send Custom Email" and it will be scheduled for the next outreach sequence.
Next leads
We'll send you an email notification every time we'll add leads to your search, and at the start of a search we recommend going into the platform whenever you get one of these to review, provide feedback, and contact the leads. Once you feel we've dialed in on your desired leads, you can change your settings to schedule your outreach automatically (if you haven't already).