Setting up your templates
 Updated
by
Support Team
Updated
by
Support Team
Before you start reaching out, you want to make sure that your templates are all set up. You are ultimately the best person to really convey what's great about your company and the position you're trying to hire for. More on that here, but for now, let's look at how to edit and save templates.
The Email Template page
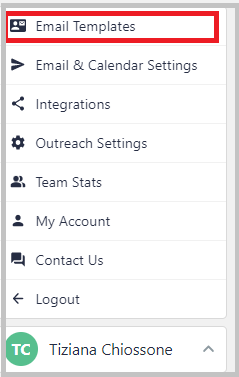
To get to your templates, click on "Email Templates" located in the settings menu on the bottom left corner of the screen:
Following this link will bring you to the email template page:
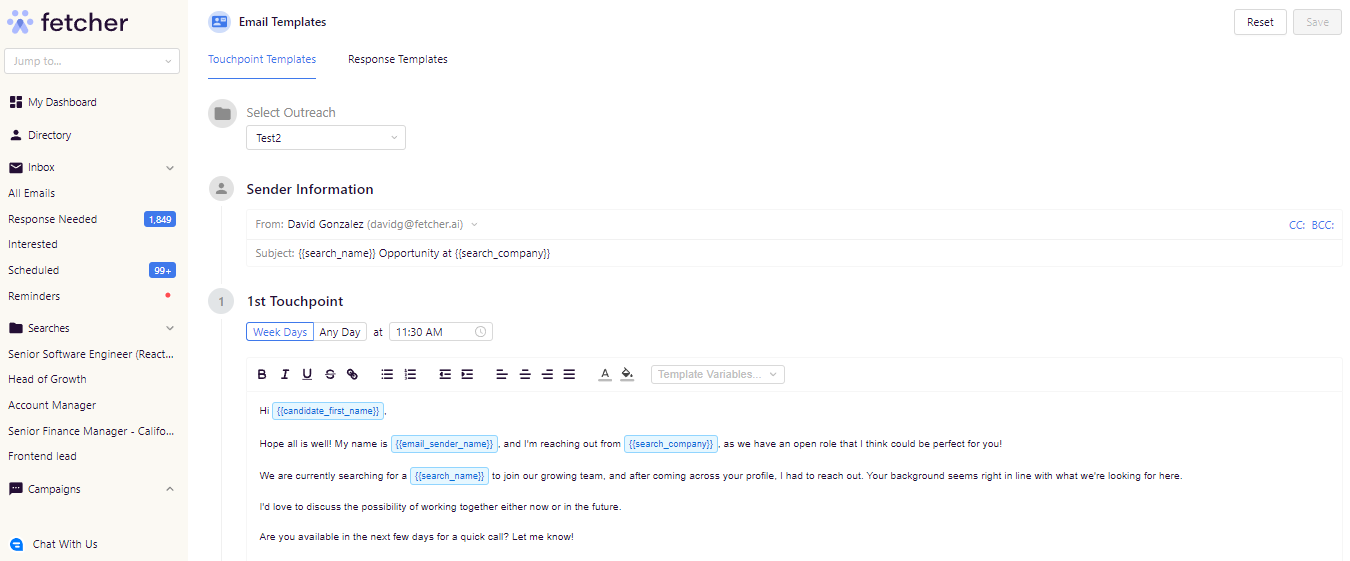
Let's make sure everything is as it should be.
Select your search
If you're running more than one search with us, you can pick the campaign you want to work on using the dropdown at the top of the screen.
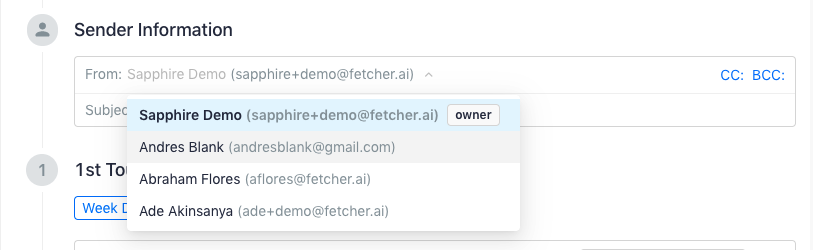
Set Sender Information
By default the sender will be set as the owner of the search, but if you have multiple people added to the search (which you can change through the outreach settings page) you can make any one of them the sender. You can also use this section to add CCs or BCCs, and to edit your subject line.
Editing the touchpoints
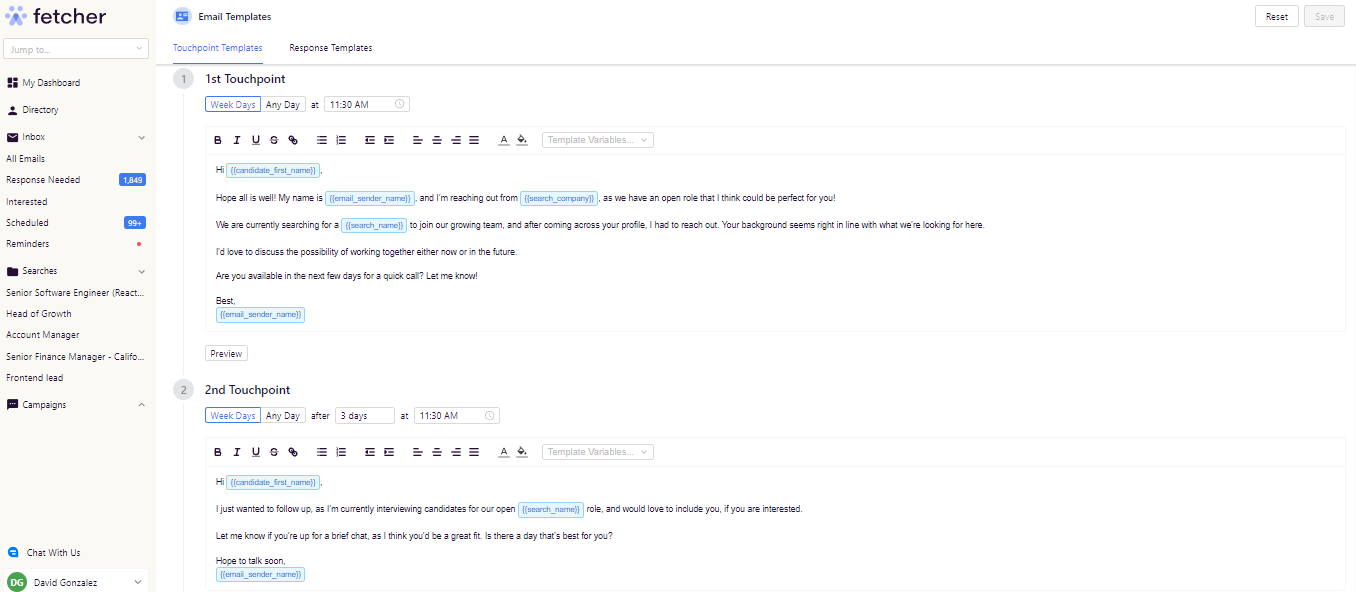
Fetcher email campaigns have a default of three touchpoints, with pre-made messages that you can use or customize.
Best Practice Tip
Changing your outreach schedule
For each of the touch points, you can indicate when you would like it to go out. By default, each touchpoint will be sent three days after the previous touchpoint at 11:30 AM in the candidate's timezone.
Altering the pre-made templates
To remove certain text in the body of a touchpoint, you will have to drag and highlight your cursor over the text you wish to remove, then hit delete on your keyboard. You'll notice that "Save" on the upper right-hand corner is now gray.
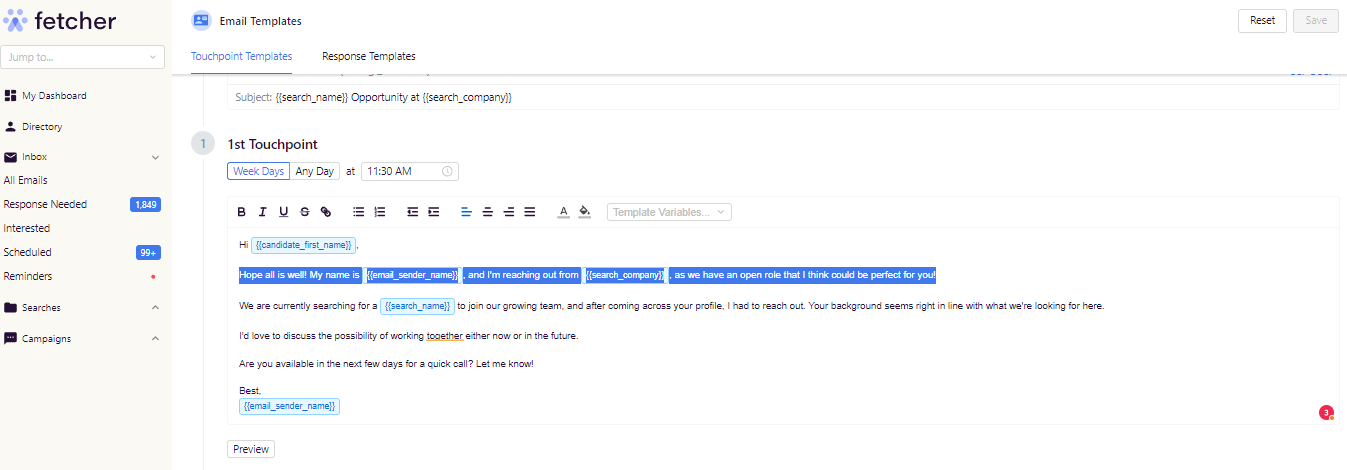
Variables
We have a number of variables available to make your life easier and help personalize your emails (full list) which you can insert using the "Variable" dropdown.
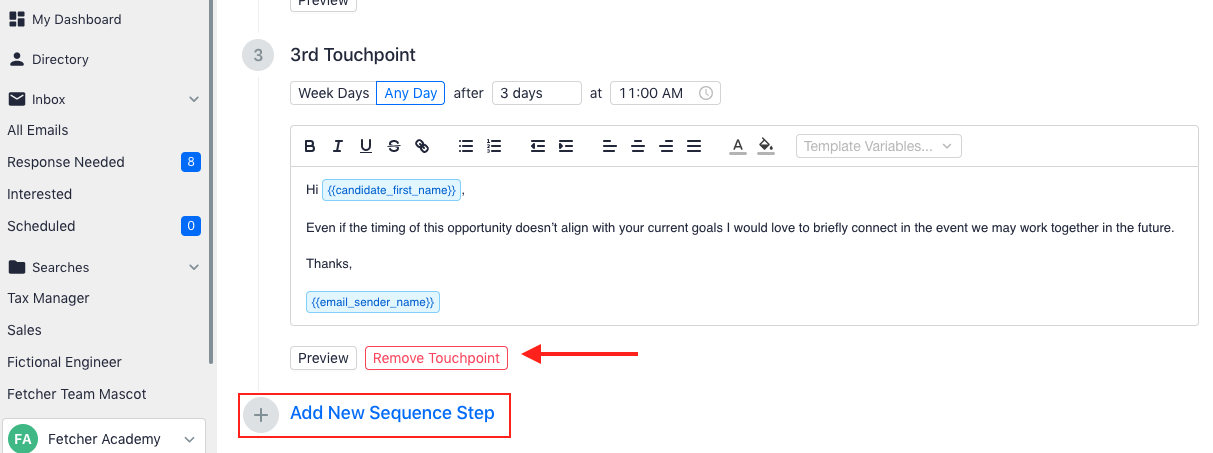
Number of Touchpoints
You can also send as few as one touchpoint, and as many as six. Below each touchpoint you will see a "Add New Sequence Step" and "Remove Touchpoint" option.
Preview
To see the result of your hard work and feel confident about how the message will look, you can click on the "Preview" button under each touchpoint on the left-hand side. Send yourself a copy of the email to see exactly how the candidates will receive it.
Saving your work
When you're happy with how everything looks, click on the "Save Changes" button at the top right-hand side of the screen.
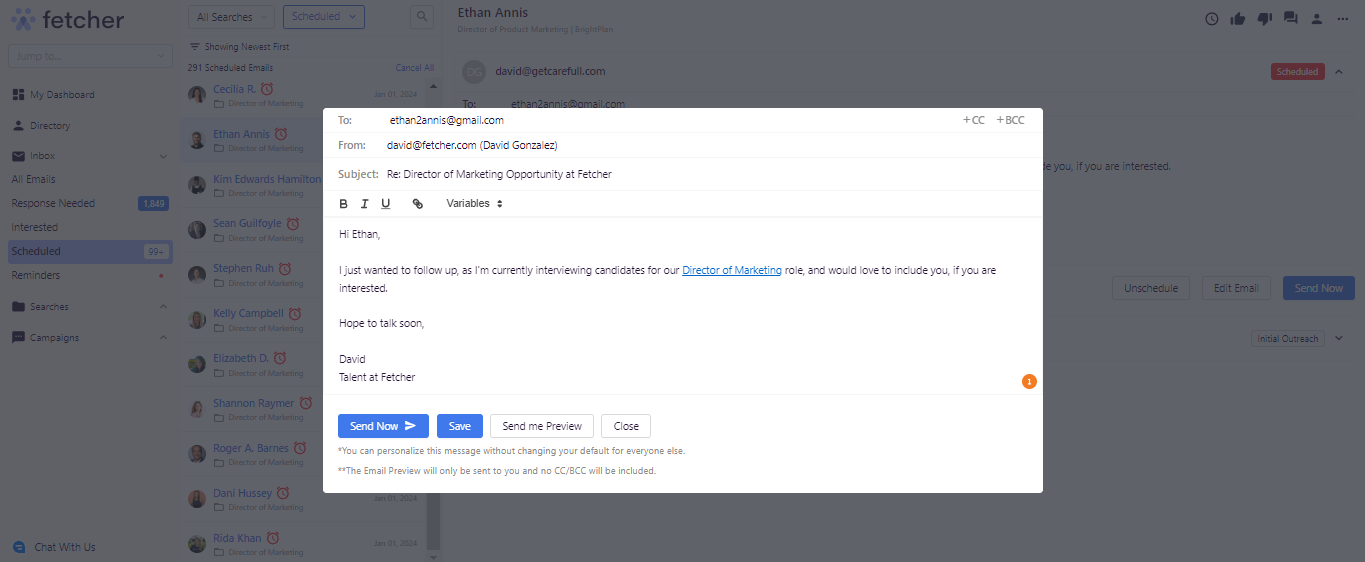
Changing scheduled messages
In the event that you want to change a message already scheduled to a candidate, you can visit your scheduled folder on the left-hand side of your account. Once you filter to the search and candidate you're trying to get to, you can click "Edit Email" and make any adjustments. You can send the new message immediately, or save it to be sent at the originally scheduled time.
Another Alternative to setting up your template is:
Alternatively, you can also find and edit the template in the position's page in the templates tab, and it will be the same process as before.
