Ashby Integration
 Updated
by
Support Team
Updated
by
Support Team
- 🔗 Syncing Your Ashby Account with Fetcher
- 1. Log into Fetcher
- 2. Select the Ashby Integration
- 3. Choose "I am an admin"
- You will then be directed to a page asking if you are an Administrator in Ashby, where you will click I am an admin.
- 4. Grant All Required Permissions
- 5. Enter Your Ashby API Key
- 6. You will be fully connected, you will now see Ashby listed in your Integrations, with Ashby Triggers available for use.
- Manually Sending Candidates to Ashby
- Uploading Leads Automatically
🔗 Syncing Your Ashby Account with Fetcher
To enable a smooth data flow between Fetcher and Ashby, follow these steps to complete the integration:
1. Log into Fetcher
- Access your account at app.fetcher.ai and navigate to the Integrations page from the main menu.
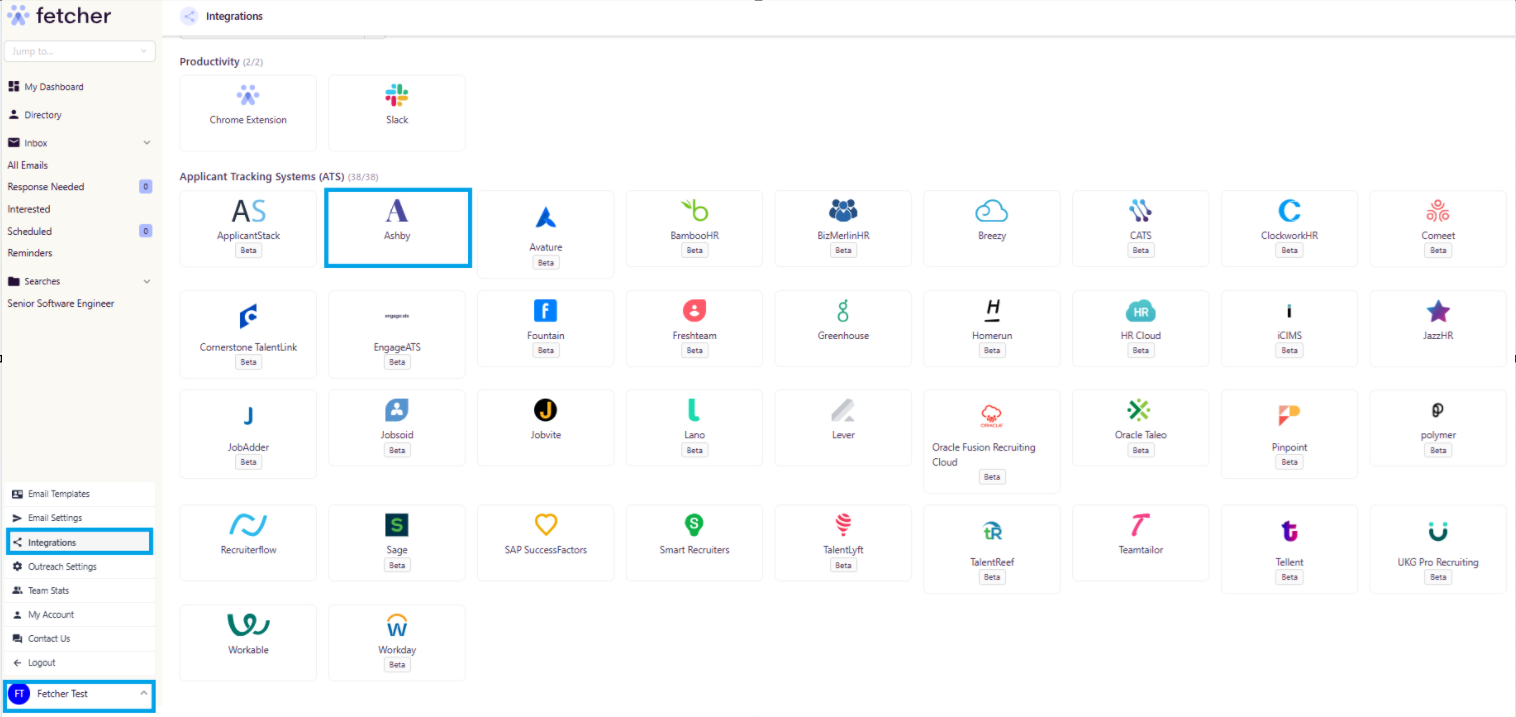
2. Select the Ashby Integration
- Click on Ashby to begin the sync process.
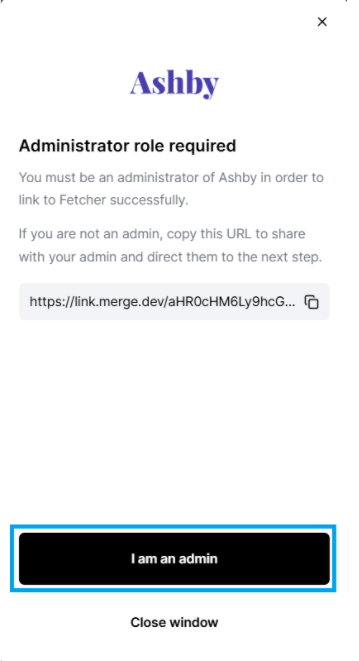
3. Choose "I am an admin"
You will then be directed to a page asking if you are an Administrator in Ashby, where you will click I am an admin.
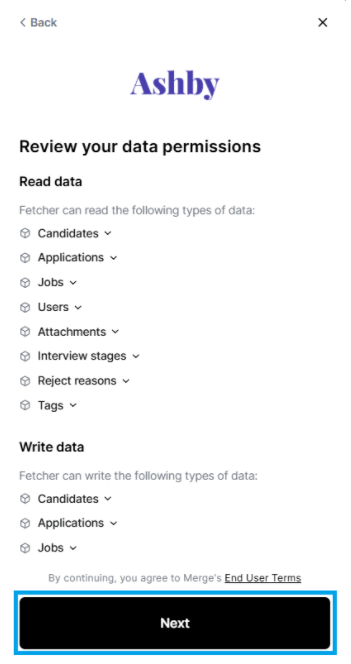
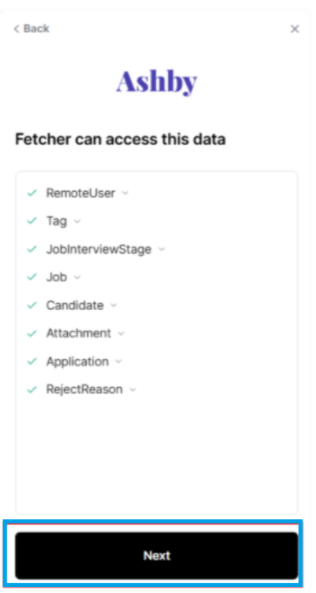
4. Grant All Required Permissions
- Confirm that all requested permissions are granted in Ashby. These are essential for enabling communication between the two platforms.
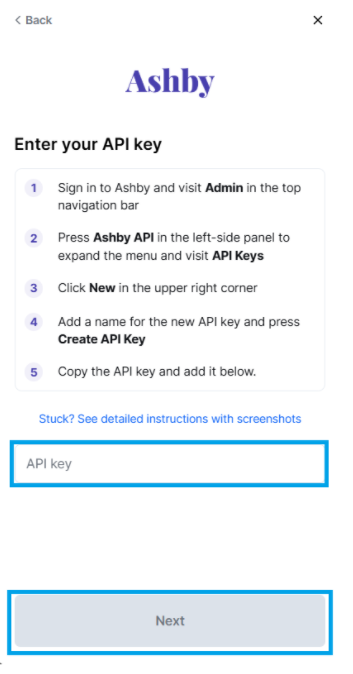
5. Enter Your Ashby API Key
- Generate a new API key from your Ashby account.
- Paste the API key into the required field in Fetcher.
6. You will be fully connected, you will now see Ashby listed in your Integrations, with Ashby Triggers available for use.
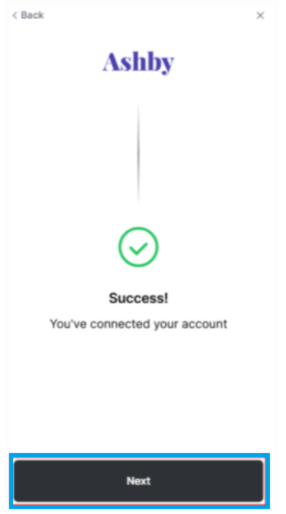
You will then be redirected back to our Integrations page.
Manually Sending Candidates to Ashby
1. Navigate to the Search
- Go to the specific search within Fetcher that includes the candidate you want to send.
2. Open the Candidate Profile
- Click on the candidate’s name to view their profile details.
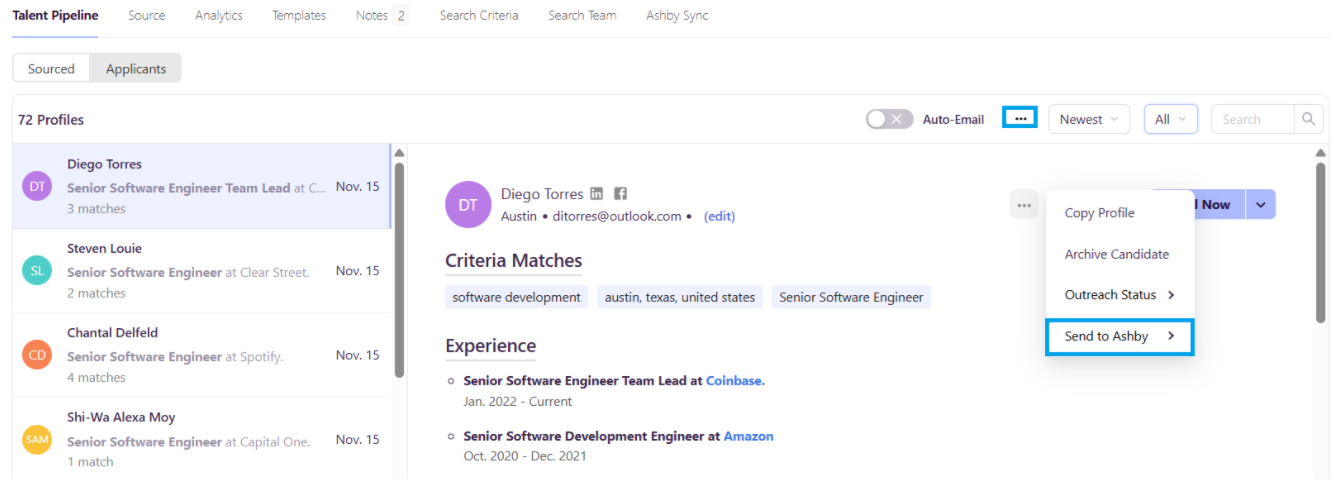
3. Send to Ashby
- Click the three dots (⋮) in the top-right corner of the profile.
- Select “Send to Ashby” from the dropdown menu.
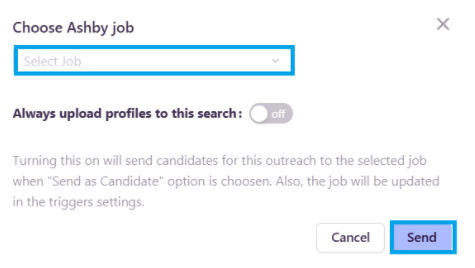
4. Choose Candidate Type
- Choose to send the individual as a “Candidate” to a Job in Ashby.

"Send to Ashby as Candidate", you will be able to select the job in Ashby you want to send the lead. Once you're done looking for the job in Ashby you would like the lead to be sent to, you can proceed by clicking "Send".
Uploading Leads Automatically
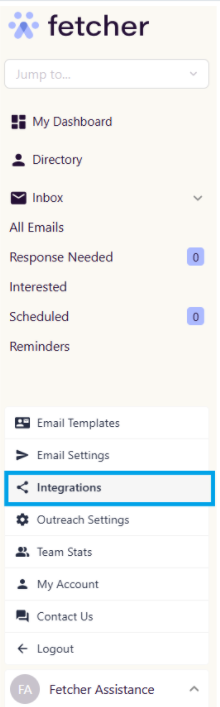
You can find your Automation Settings by going to your Profile Tab ( lower left-hand of the screen) > Integration.
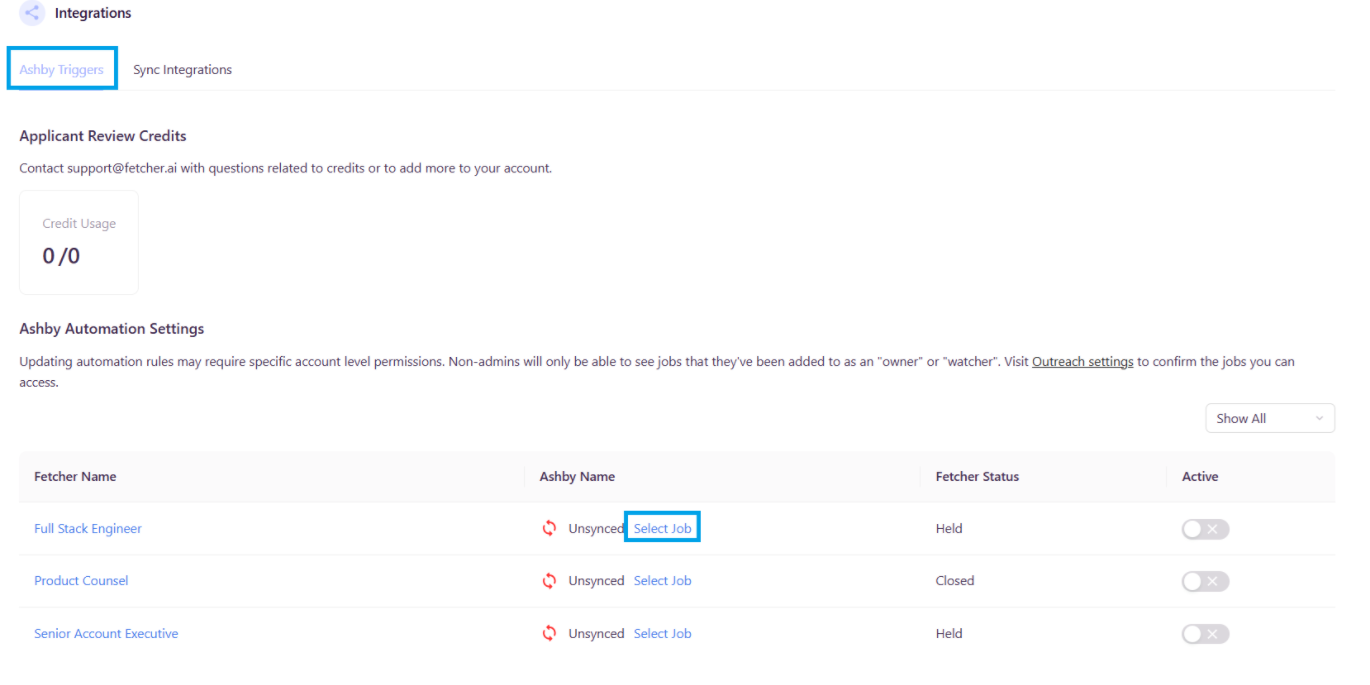
- Here you will see all the positions you have access to, however, you will only be able to set the automation for those positions that you own. You will also land on the "Ashby" page, which will enable you to automate the uploading of leads/candidates to your Ashby.
From here, you will be able to choose what search you want to automate. You just need to click "Select Job".
Once the "Select Job" is clicked, you will be routed to the " Ashby Sync" page of your chosen search.
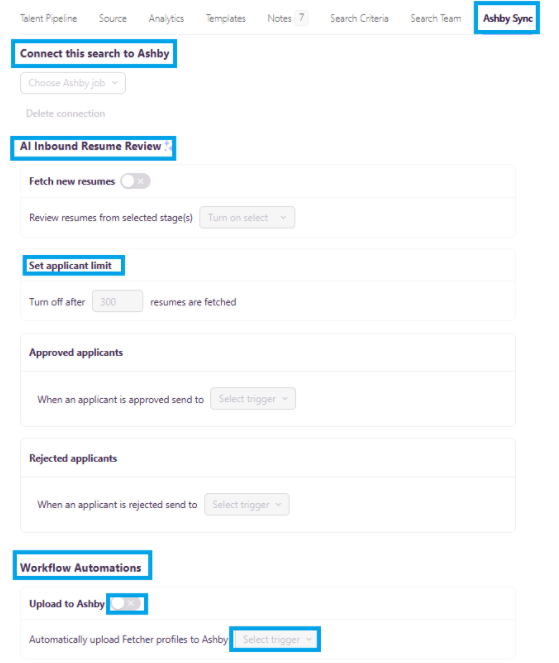
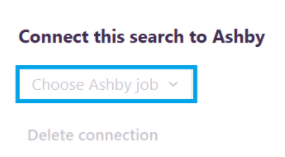
Step 1: Tell us where
When you have decided on the point at which you would like your leads to be uploaded, you can then choose where these leads will be sent in Ashby.
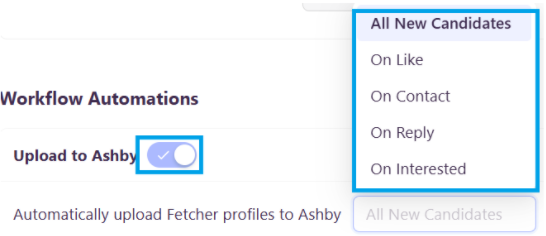
Step 2: Tell us when
Use the drop-down menu beside "Automatically upload Fetcher profiles to Ashby" to choose at which point you would like leads to be uploaded to Ashby. You can choose to upload at any of 5 points in the process. Those are:
- All New Candidates - When you receive a batch all will be automatically uploaded.
- On Like - When you 'like' a lead while giving feedback.
- On Contact - When an email is sent to the lead.
- On Reply - When a lead replies to an outreach.
- On "Interested" Reply - When a lead replies positively.
Successful upload of candidates from Fetcher to Ashby
Once the candidate has successfully uploaded either through a "Manual" or "Automated" process. You will see the upload status record in the Candidate's title card and inside Ashby. This will serve as a record that the upload has been successfully processed.
Candidate's Title Card
You will see the record the the bottom part of the candidate's title card.

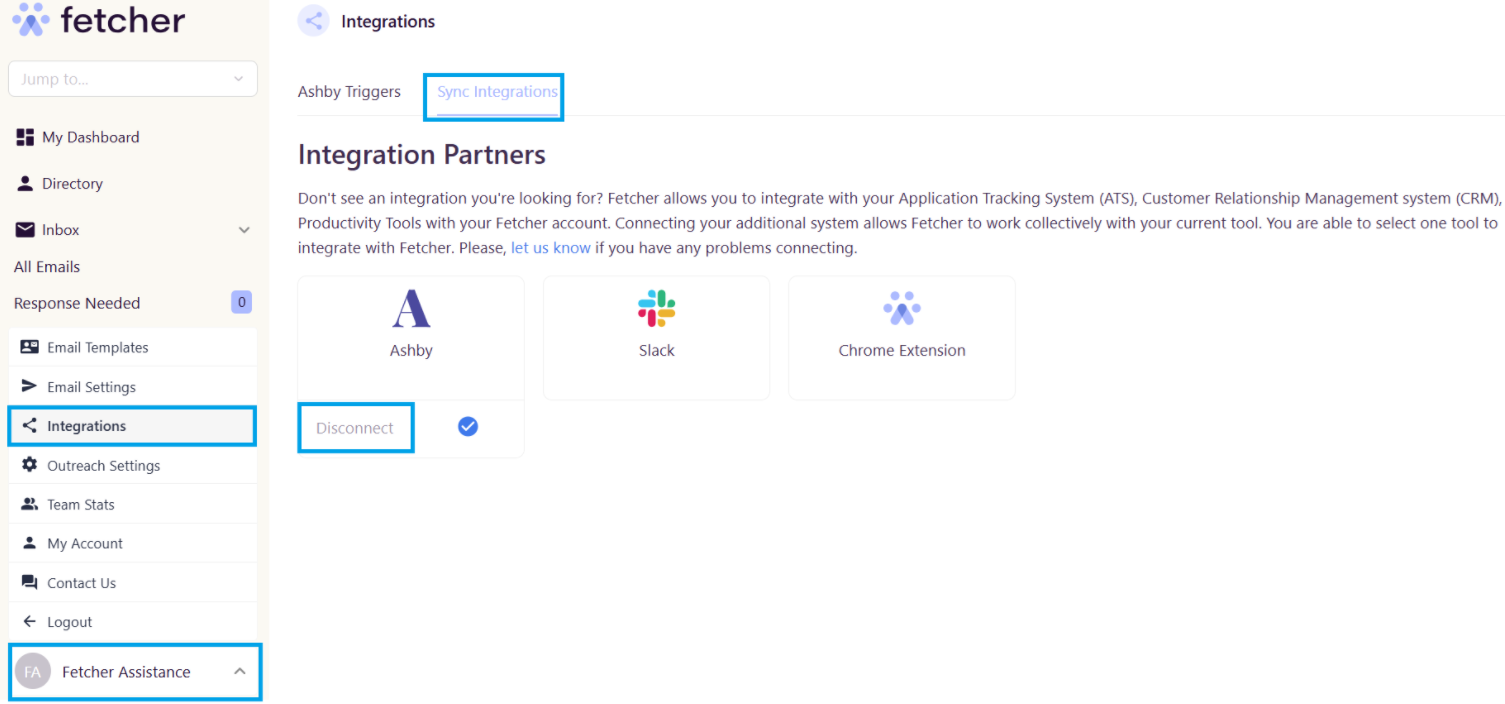
Revoking Ashby Access
If you wish to disconnect your Ashby account with Fetcher, simply click your Profile Tab > Integrations > Sync Integrations > Disconnect.