Tellent Recruitee Integration
 Updated
by
Support Team
Updated
by
Support Team
Fetcher + Tellent Recruitee Integration
Supercharge inbound and outbound hiring.
Connect tellent recruitee to Fetcher to streamline job syncing, centralize candidate data, and power both sides of your recruiting funnel with AI.
Why integrate with tellent recruitee?
- Faster review of inbound applicants → Let AI highlight the strongest fits automatically.
- Smarter outbound sourcing → Launch personalized outreach directly from jobs synced from tellent recruitee.
- Rediscovery of past candidates → Re-engage talent already in your ATS, ranked by relevance.
- Seamless data sync → Push approvals and rejections back into tellent recruitee—no double entry.
🚀 Quick Setup Steps
🕑 Time to install: ~3-5 minutes
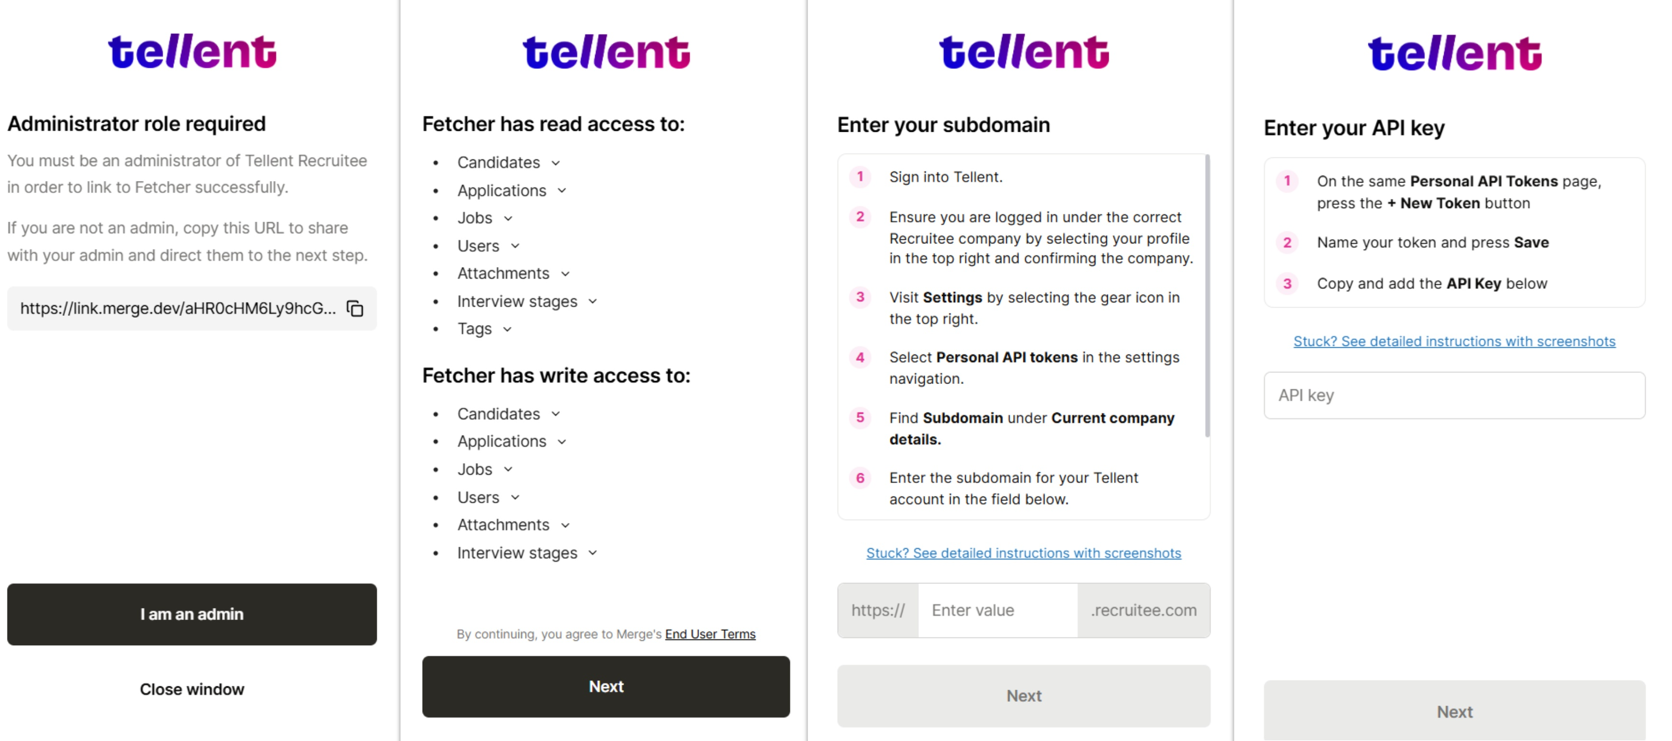
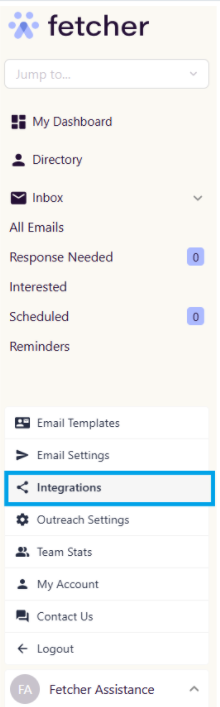
- Go to Fetcher → Settings → Integrations
- Enter "tellent recruitee" from the search input or select directly from list.
- Follow the prompts from our UI
- Note: You must be an admin and have an API Key
- Once you've entered your subdomain and have successfully log in to tellent recruitee, you are now ready to input the correct API Key and approve the scopes you require and hit "Next"
- Success! Sync authorization is complete. Please note that it may take some time for your data to follow sync once this connection is successful.
✅ What’s Next?
With tellent recruitee + Fetcher you can:
- Pre-screen resumes with AI Applicant Review. If you want to know more about our AI Applicant Review feature, kindly click here.
- Upload profiles manually or automatically
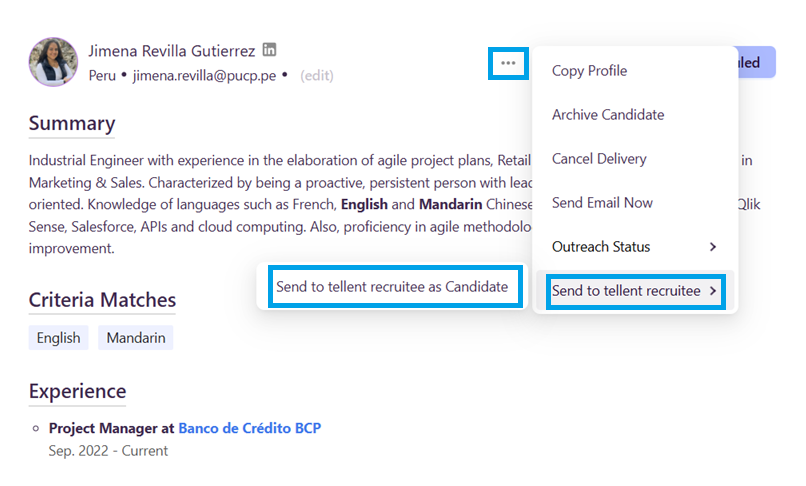
- To upload manually - Simply click the ellipsis (...) icon on a profile and select your desired tellent recruitee option
- To upload automatically - Visit the "tellent recruitee" or ATS tab on any Fetcher search
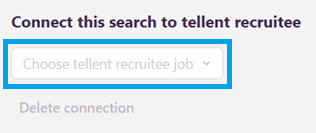
- Connect the Fetcher search to the active tellent recruitee job
- Select the trigger you would like to use to send profiles to tellent recruitee: All Profiles, On Like, On Contact, On Response, or On Interest
- Whenever those events are triggered that profile will automatically be sent to tellent recruitee
Helpful Images
Manually adding a profile
Setting up AI Applicant Review and automated uploads to tellent recruitee
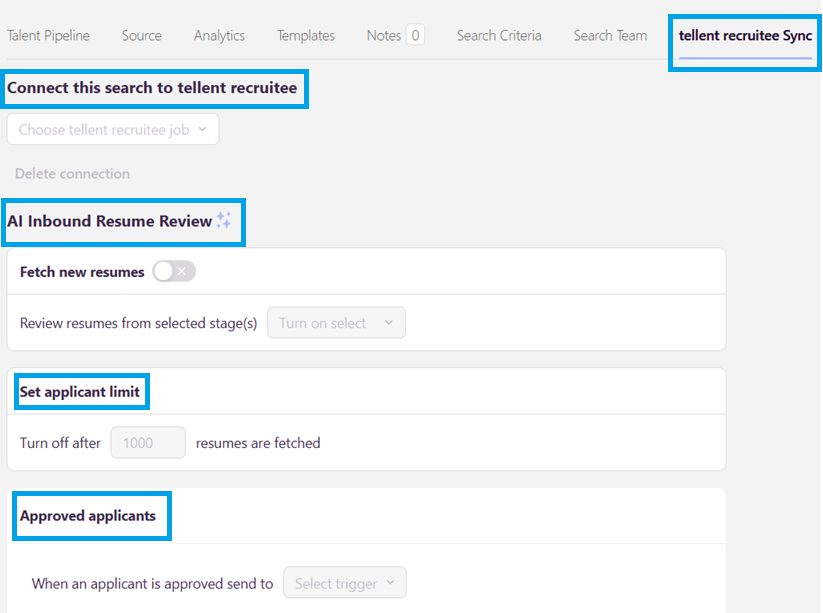

1: Tell us where
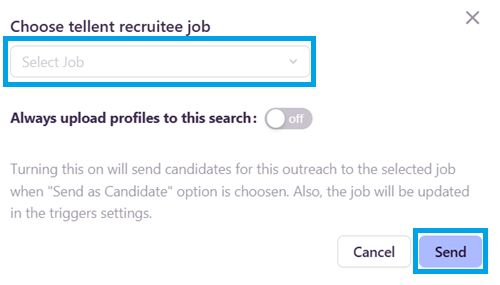
When you have decided on the point at which you would like your leads to be uploaded, you can then choose where these leads will be sent in tellent recruitee.
Step 2: Tell us when
Use the drop-down menu beside "Automatically upload Fetcher profiles to tellent recruitee" to choose at which point you would like leads to be uploaded to tellent recruitee. You can choose to upload at any of 5 points in the process. Those are:
- All New Candidates - When you receive a batch all will be automatically uploaded.
- On Like - When you 'like' a lead while giving feedback.
- On Contact - When an email is sent to the lead.
- On Reply - When a lead replies to an outreach.
- On "Interested" Reply - When a lead replies positively.
Revoking tellent recruitee Access
If you wish to disconnect your tellent recruitee account with Fetcher, simply click your Profile Tab > Integrations > Sync Integrations > Disconnect.