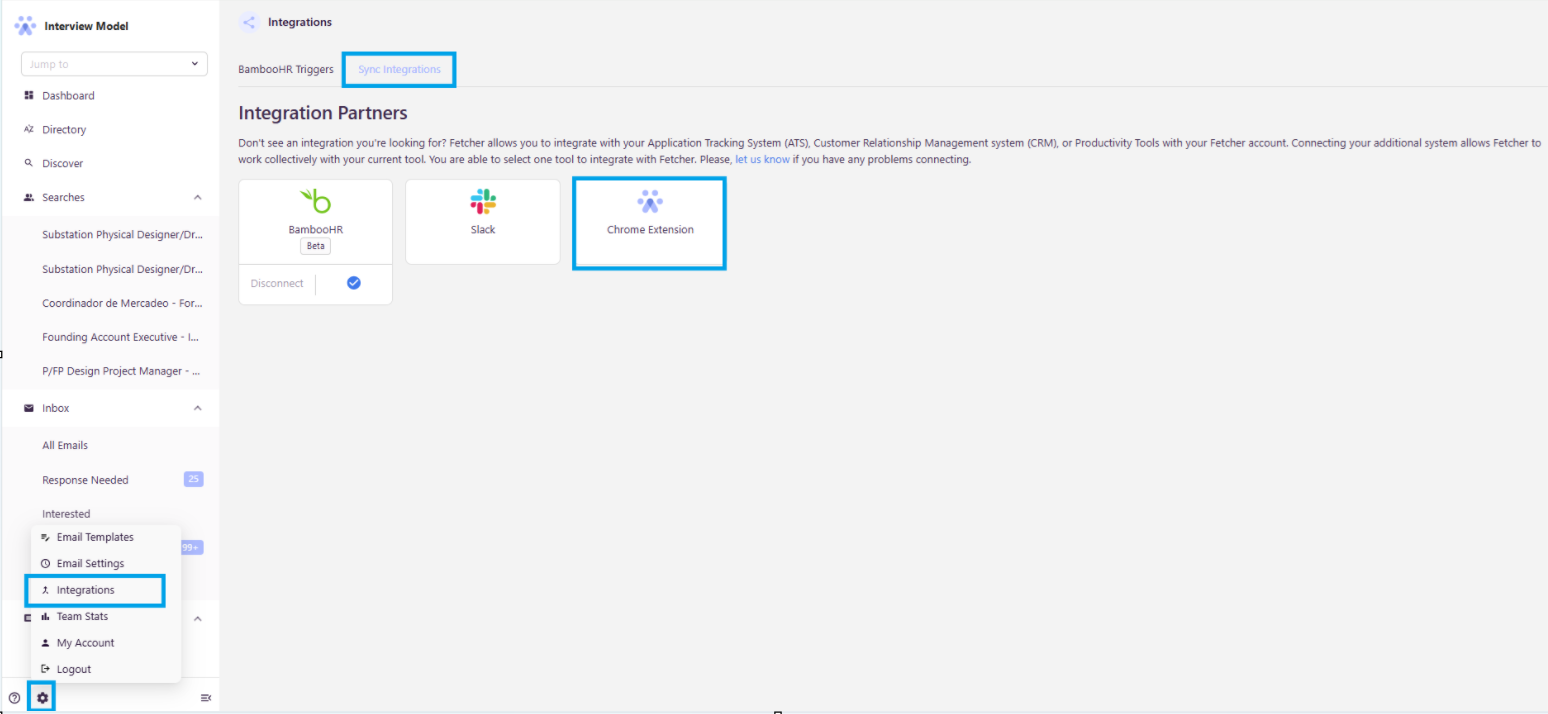
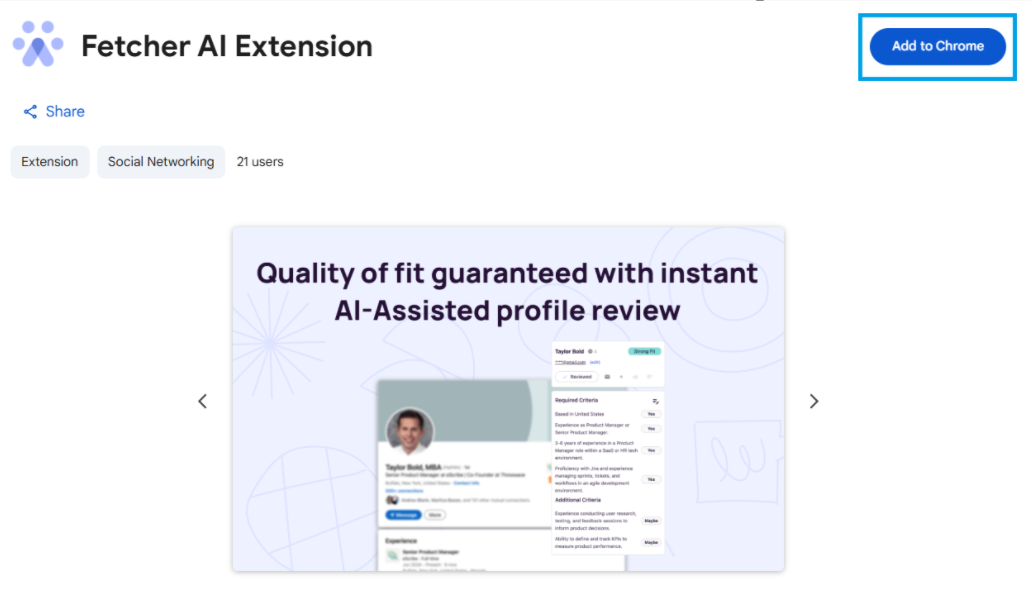
The Fetcher Chrome Extension allows you to source and manage candidate profiles directly from LinkedIn while syncing them to your Fetcher searches. This guide will walk you through setting up and using the extension effectively.
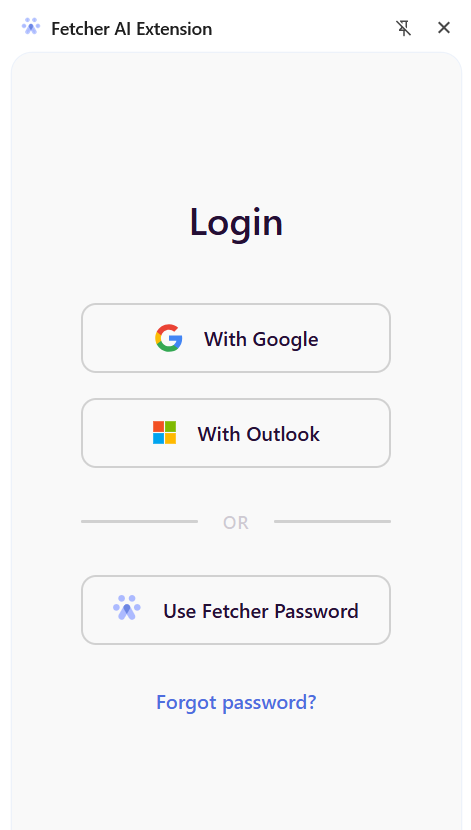
Once signed in, you’ll be directed to the Settings Tab.
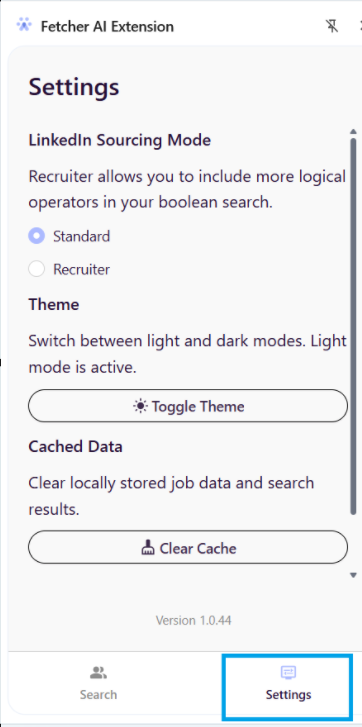
Settings Tab
In the Settings Tab, you can:
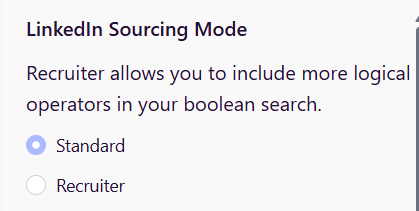
LinkedIn Sourcing Mode: Choose between Standard or Recruiter mode based on your LinkedIn account.
Theme: Switch between Light and Dark modes as preferred (default is Light Mode).
Cached Data: Clear all locally stored job data and search results if needed.
Log Out: Sign out of the extension if needed.
Tip: Configure your preferred settings before moving to the Search Tab
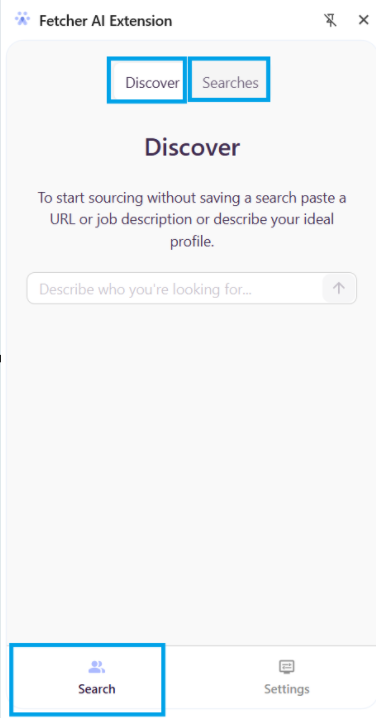
Search Tab
The Search Tab contains two main options: Discover and Searches.
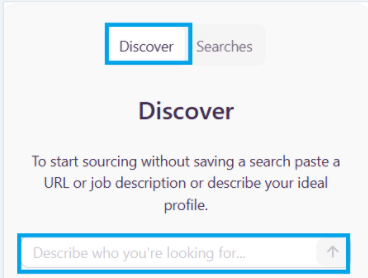
Discover
Start sourcing without an existing search.
Copy and paste a job description or URL, or describe your ideal candidate profile.
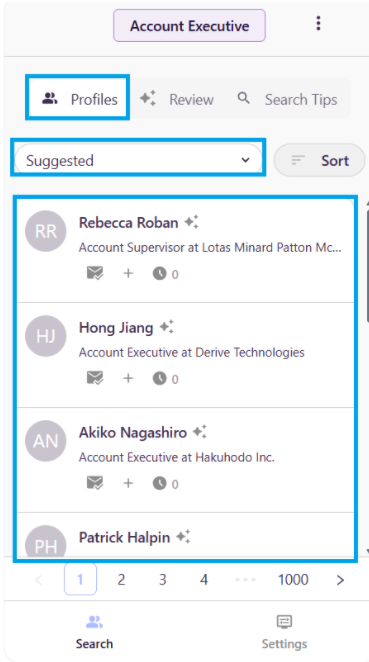
Suggested profiles will appear for review based on your input.
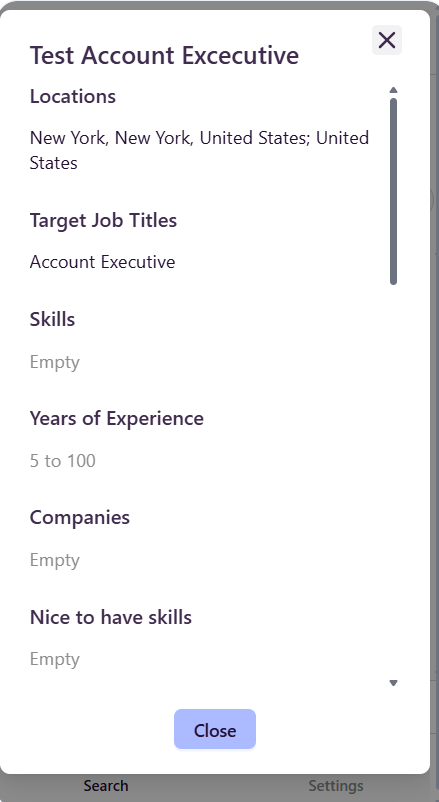
Click on the Name of the Role you entered to view the search criteria associated with that search.
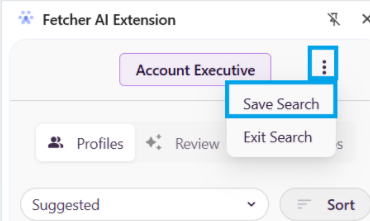
Saving a Search from Discover
You can also create and save a new search directly from the extension. To save your search:
Click the three dots (⋯) beside the name of the imputed role.
Select Save Search.
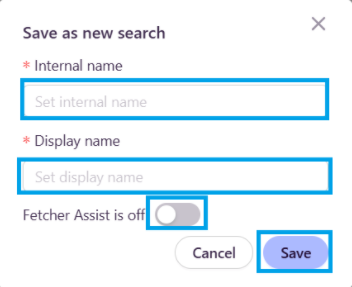
A pop-up will appear where you can:
Enter the Internal Name of the search
Enter the Display Name of the search
Choose whether Fetcher Assist should be enabled or disabled
Click Save to finalize.
Once saved, the new search will automatically be available in the Fetcher platform.
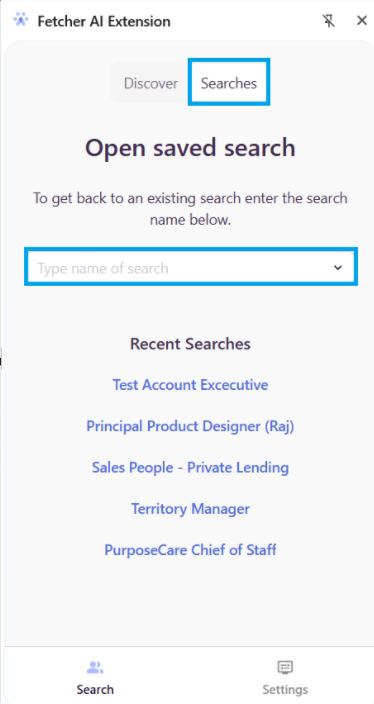
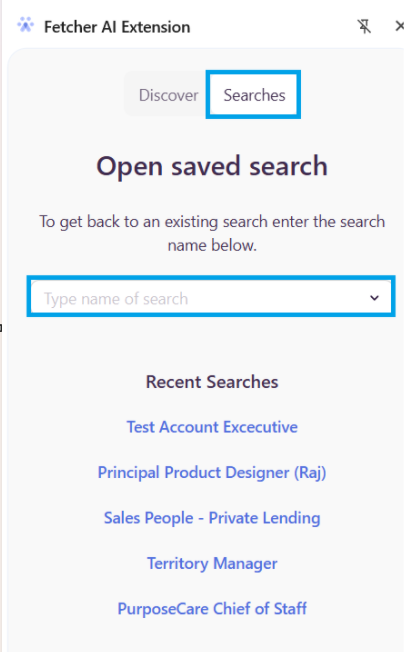
Searches
Select an existing search from your Fetcher account.
The extension will automatically pull search criteria from the source tab and "Suggest" matching candidates.
View and manage your candidate pipeline, including liked, disliked, and unvetted leads.
Sourcing Tabs:
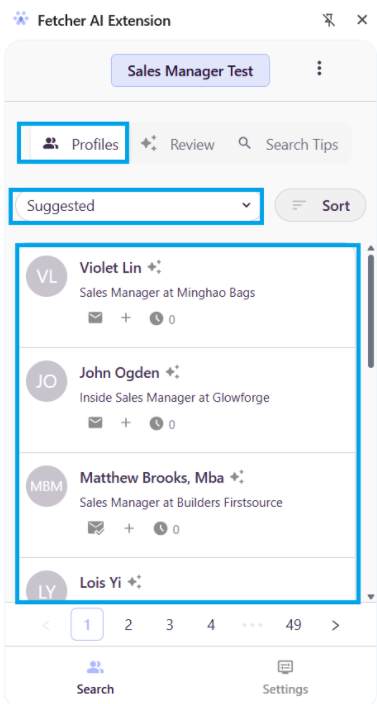
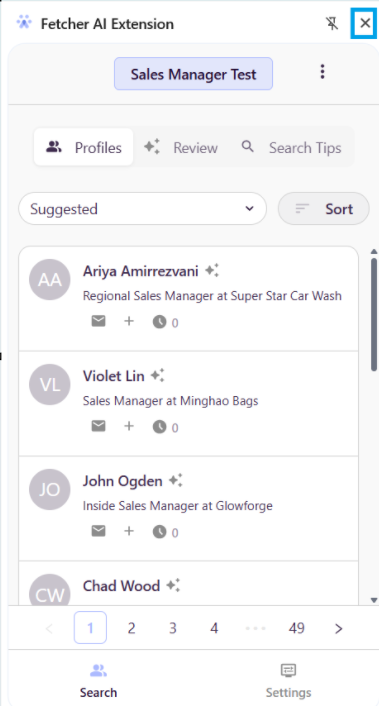
Profiles Tab
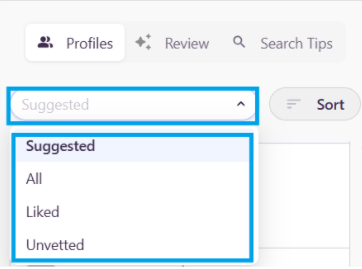
"Suggested" Filter: Displays candidates from our database that align with your search criteria.
View and manage your candidate pipeline, including liked, disliked, and unvetted leads.
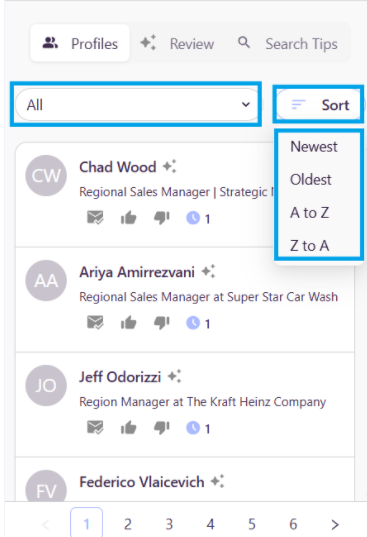
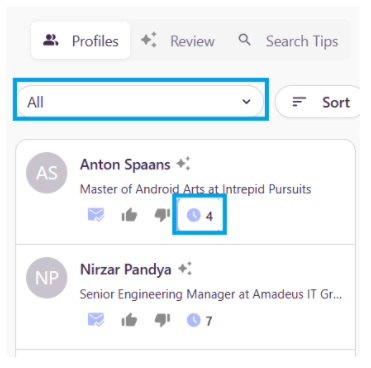
If you select “All,” you will be able to view all leads added to the search you are currently in. You can also organize your candidates by clicking the Sort icon and selecting:
Newest to Oldest
Oldest to Newest
A to Z
Z to A
Email & Activity Indicators:
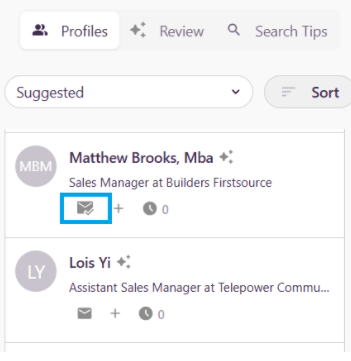
Suggested section
In the Suggested section, you can quickly identify which leads have an available email by looking for the envelope icon with a green check mark. If no check mark is present, you can click the icon to look up the candidate’s email.
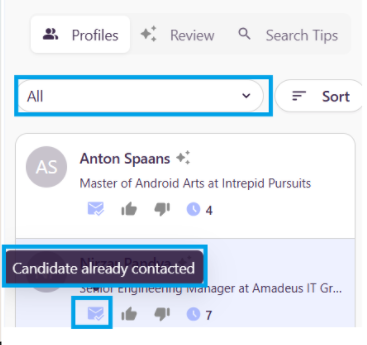
In the All section, you can view a candidate’s outreach by hovering over the envelope icon, which will show if they have been contacted within the current search.
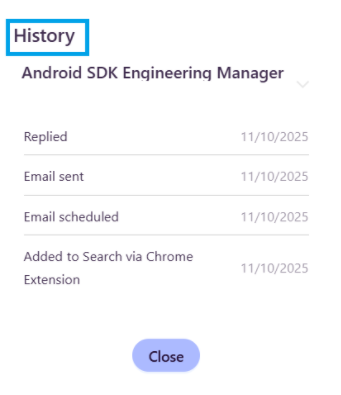
To view the History profile activity, click the clock icon to access the full profile history.
Editing Search Criteria: If you wish to continue self-sourcing candidates from our database in the Profile tab but want to adjust your search criteria, you will need to edit the Source Tab within your search on the Fetcher platform. To do this:
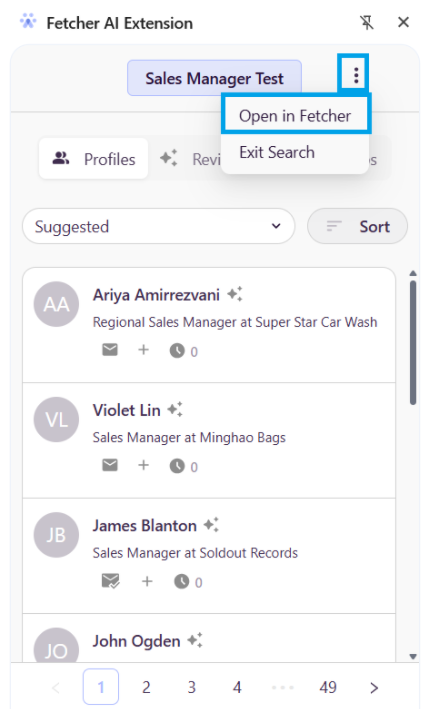
Click the three dots (⋯) next to your search name in the extension.
Select Open in Fetcher , this will redirect you to the search in the platform.
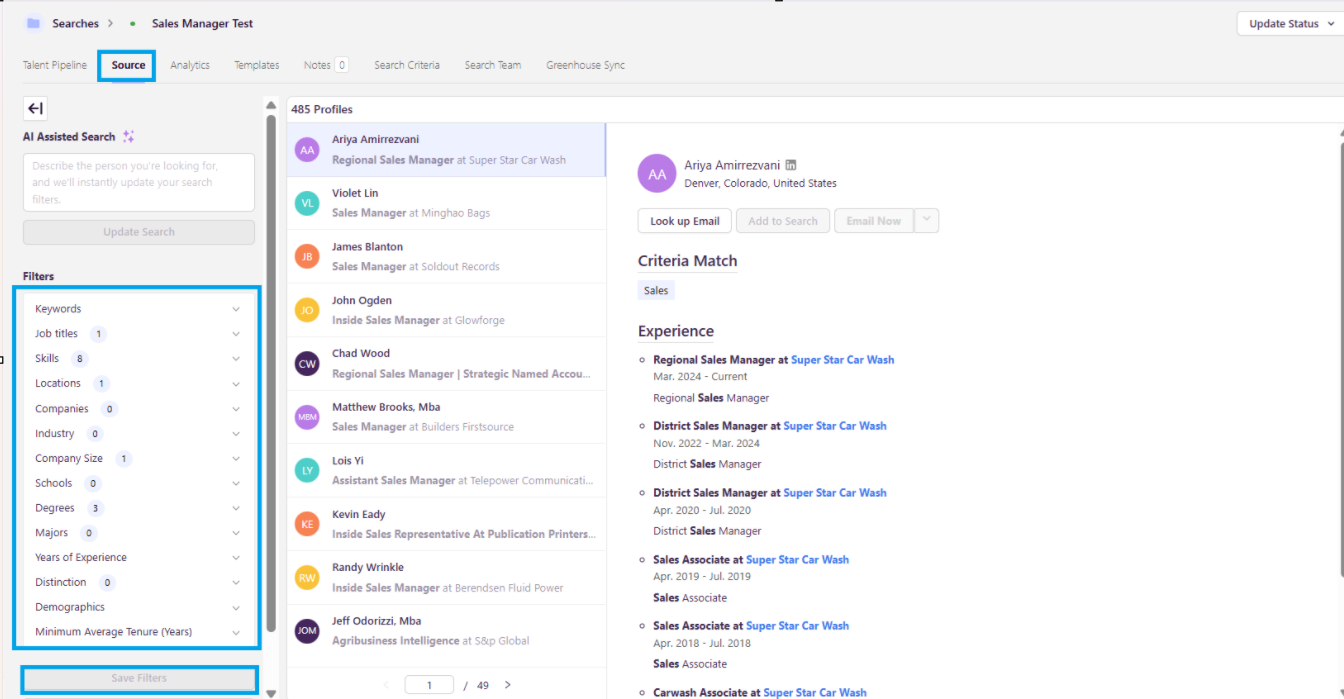
Navigate to the Source Tab in your search.
Make the necessary changes and Save them.
Once saved, your updated criteria will apply when sourcing additional "Suggested" candidates from the Profiles Tab.
You may occasionally see a “No Matching Profiles” message under the Suggested tab. There’s no need to worry; this simply means that the current filters may be too narrow or need adjustment.
To resolve this, head over to the Self-source tab and make a few tweaks to your filters as outlined above. Small changes can significantly improve your results.
For more guidance, you can refer to this help article on best practices for using filters in the Self-source tab:
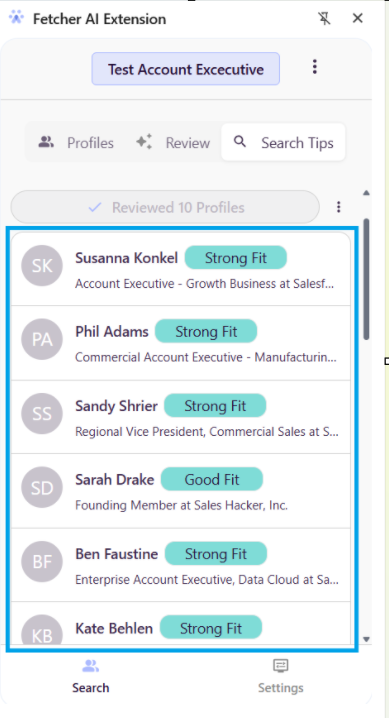
Using Bulk Review in the Chrome Extension
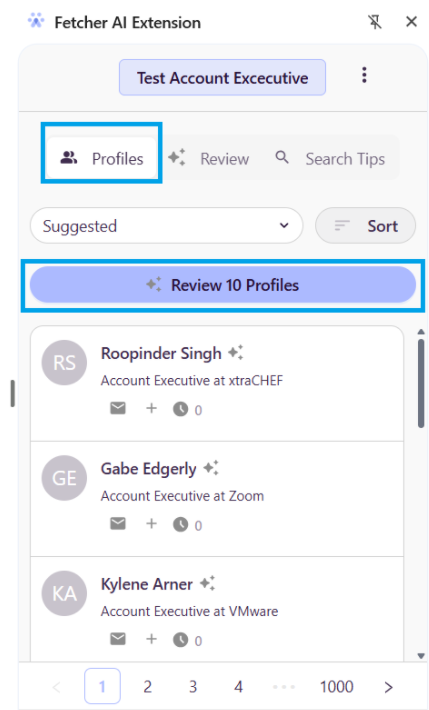
1. Profiles Tab (Fetcher Database)
Navigate to the Profiles tab in the extension
Click “Review 10 Profiles”
What this does:
Reviews 10 candidates at a time
Uses criteria defined in your Fetcher search sourced tab filters.
Enables quick skimming and decision-making
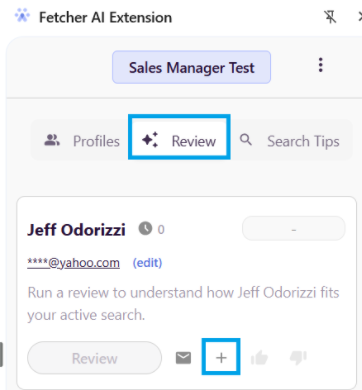
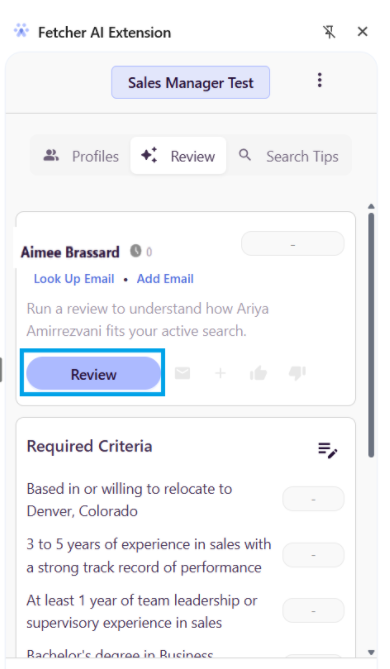
Review Tab
The Review Tab allows you to manage sourced leads before adding them to a search and take further actions to engage candidates efficiently.
Adding and Managing Profiles
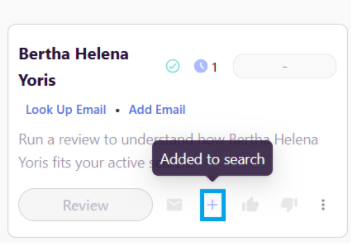
Add (+) a profile: to add (+) a profile to your search.
There are three ways to add profiles to Fetcher
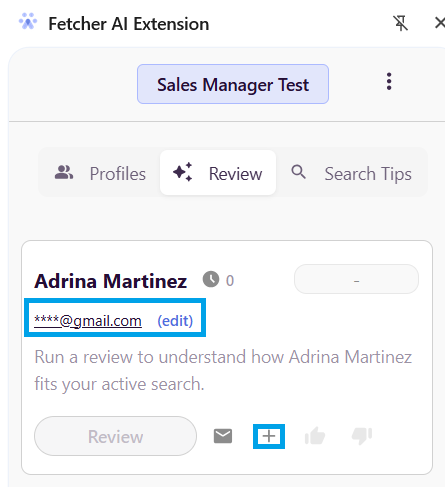
If Fetcher identifies an email associated with the profile, and you want to add it, click the add(+) symbol to add the lead to the search. Once added to the search, the email will unmask.
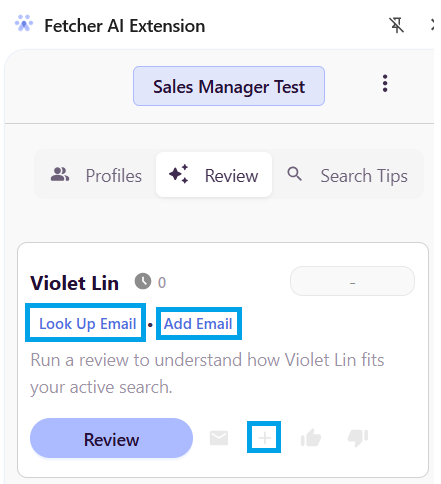
If Fetcher doesn't identify an email associated with the profile, the "Lookup Email" and "Add Email" options will appear.
Look Up Email Process:
Click “Look up email”
Fetcher will retrieve a validated email from one of our trusted providers
Click “Save”, and the profile will be automatically added to your search
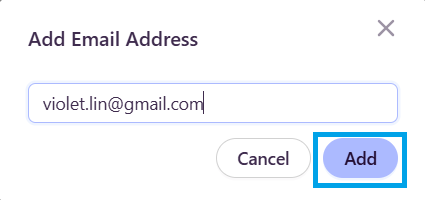
Manual Email Process:
If you already have the candidate’s email, you can manually input it.
Click “Add Email,” enter the email address. Click “Add”, and the profile will be automatically added to your search
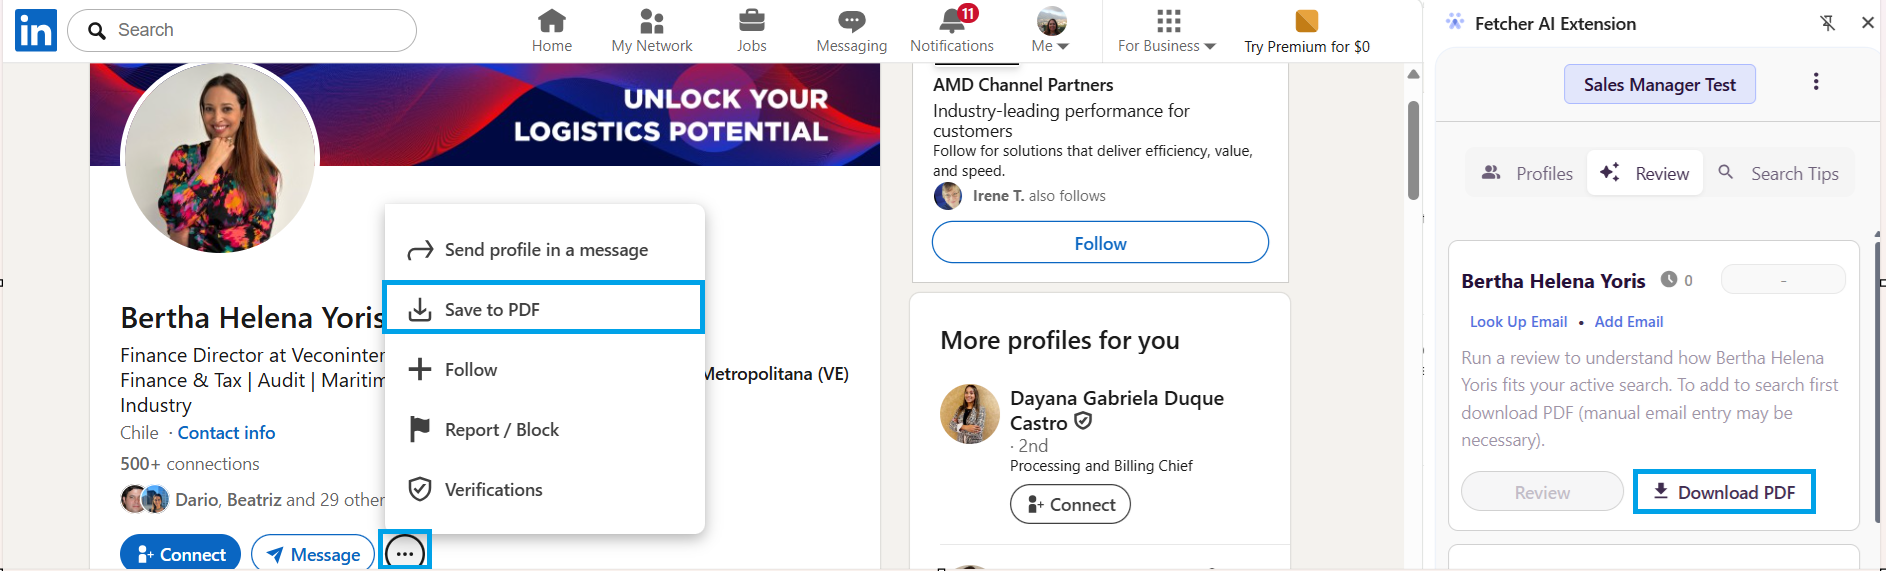
If Fetcher doesn't identify the profile, the Download PDF option will appear.
Click "three dots (...)" and "Save to PDF"
Click “Look up email”
Fetcher will retrieve a validated email from the PFD file
The profile will be automatically added to your search if it finds a valid address after you have Saved to PDF.
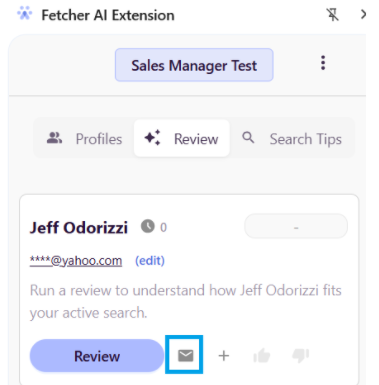
Emailing Leads Directly
You can email candidates directly from the Review Tab.
Click the envelope icon beside the candidate to schedule an email immediately.
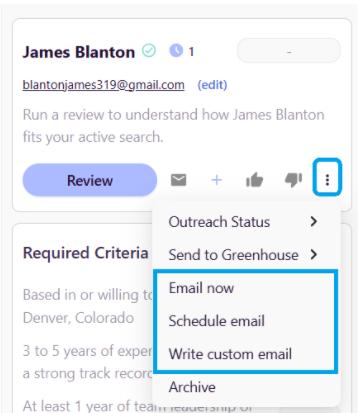
Alternatively, once the candidate has been added to a search, you can click the three dots (...) beside the Like & Dislike buttons to access additional outreach actions:
Email Now – send a standard email immediately
Schedule Email – schedule an email to be sent at a later time
Write Custom Email – compose a personalized email before sending
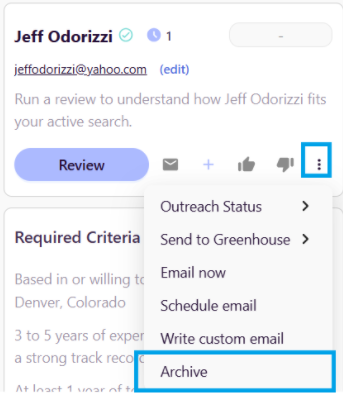
Additional Actions via Three Dots
From the three dots (...) menu next to the Like & Dislike buttons, you can also:
View Outreach Status – See if a candidate is Scheduled, Contacted, Responded, or mark it as Contacted Outside Fetcher
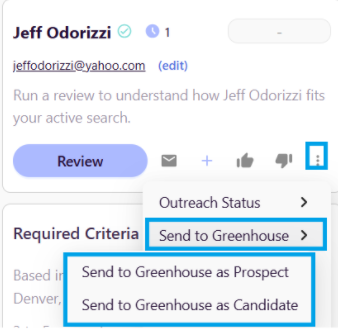
Send to ATS or Search – send the candidate directly to your designated ATS as a prospect or add them to a specific job, depending on your ATS's options. (Applicable if synced)
Archive Candidate – remove a candidate from your pipeline if you no longer wish to see them
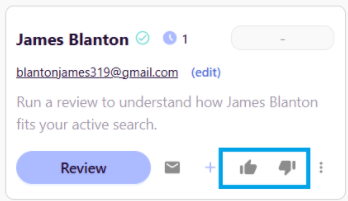
Like or dislike candidates
To quickly organize and prioritize leads after a candidate has been added to the search.
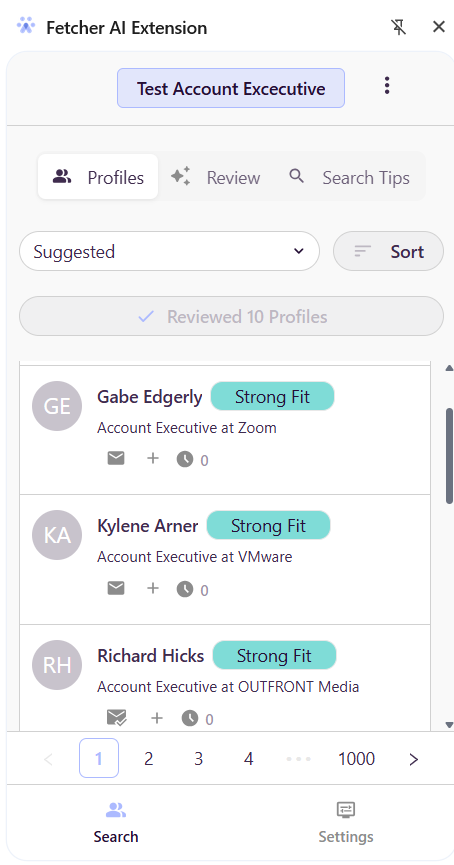
AI Profile Review:
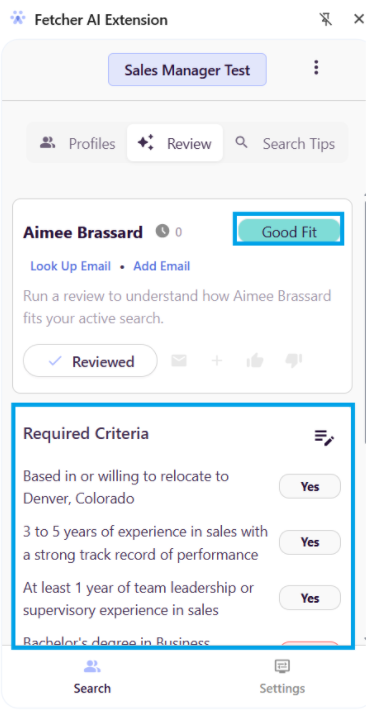
Our AI evaluates each profile against your search criteria and highlights the key matching factors used in the evaluation. You can quickly see how well a candidate aligns with your search requirements:
Strong Fit
Good Fit
Uncertain Fit
Unlikely Fit
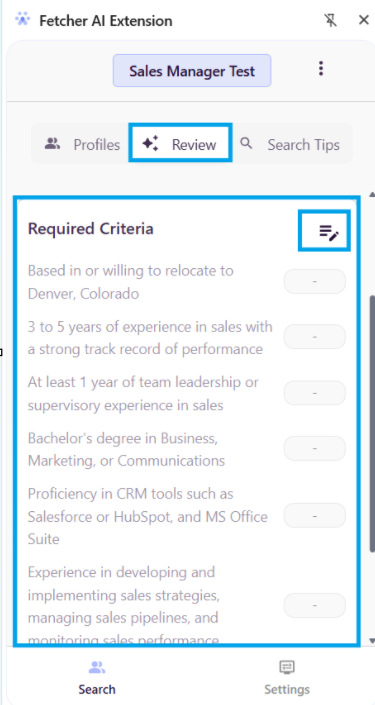
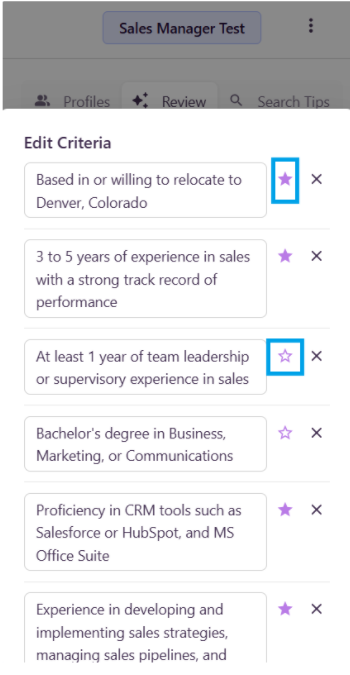
In addition, you can view which specific criteria from your search are being used to evaluate each lead under the Required Criteria section.
To edit the criteria, click the notepad icon.
From there, you can adjust the criteria to better reflect what you are looking for in candidates.
You will also see purple stars next to each criterion:
A purple star (enabled) indicates that the criteria is required for the candidate to meet.
A white star (disabled) indicates that the criteria is considered a nice-to-have rather than mandatory.
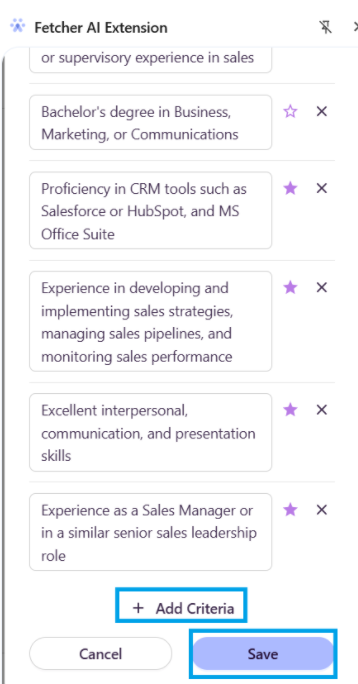
You can also add additional criteria fields as needed to further refine the evaluation
Important: Be sure to click Save after making any changes to ensure your updated criteria are applied. Once saved, click Review again so the system can evaluate the lead using the updated criteria.
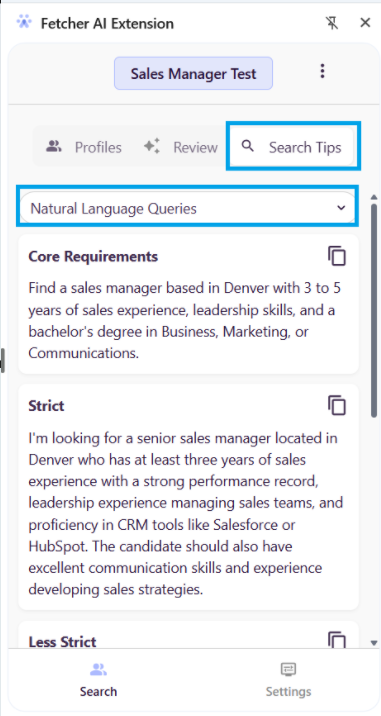
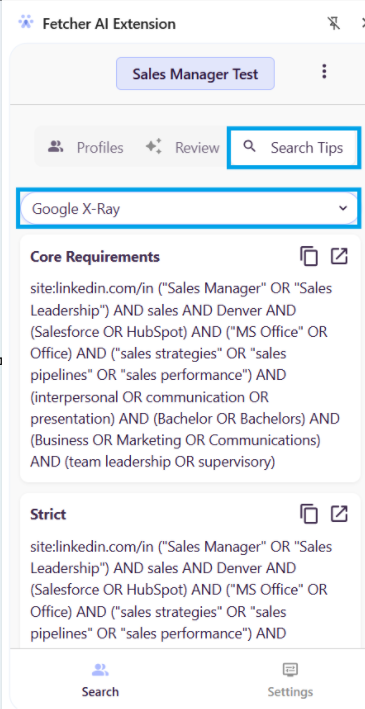
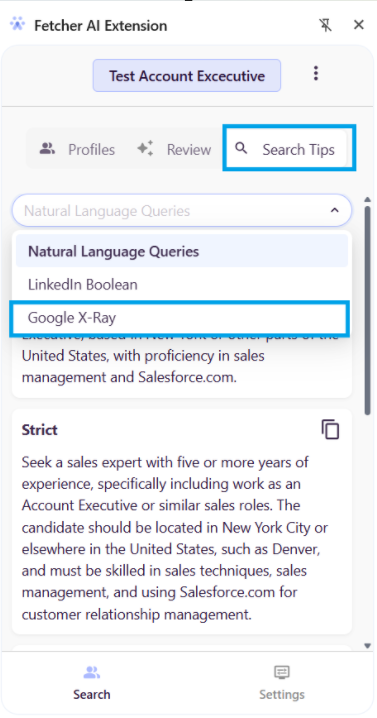
Search Tips Tab
The Search Tips Tab helps you refine and optimize your sourcing strategy by providing tailored recommendations based on your search criteria.
Access Natural Language Queries to refine searches.
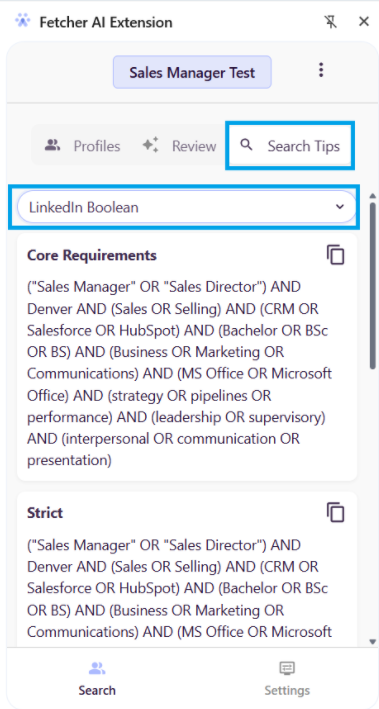
Find suggested LinkedIn Boolean strings.
Use Google X-Ray tips to perform targeted Google searches that surface LinkedIn profiles based on your search filters.
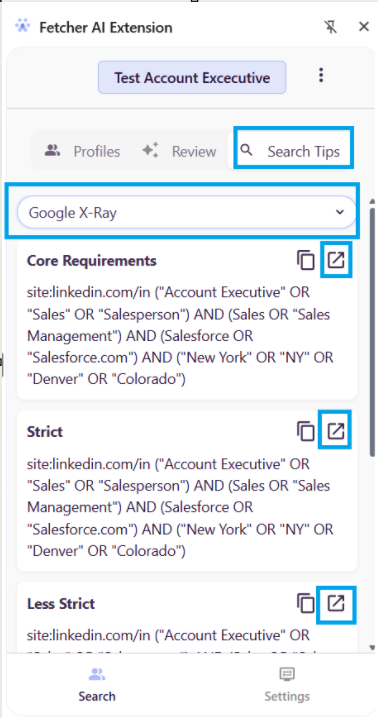
Search Tips (Google X-Ray Sourcing)
The Search Tips tab allows you to source candidates via Google X-Ray searches.
Steps:
Navigate to Search Tips in the extension and filter Google X-Ray Select a search type:
Core Requirements
Strict
Less Strict
Expanded
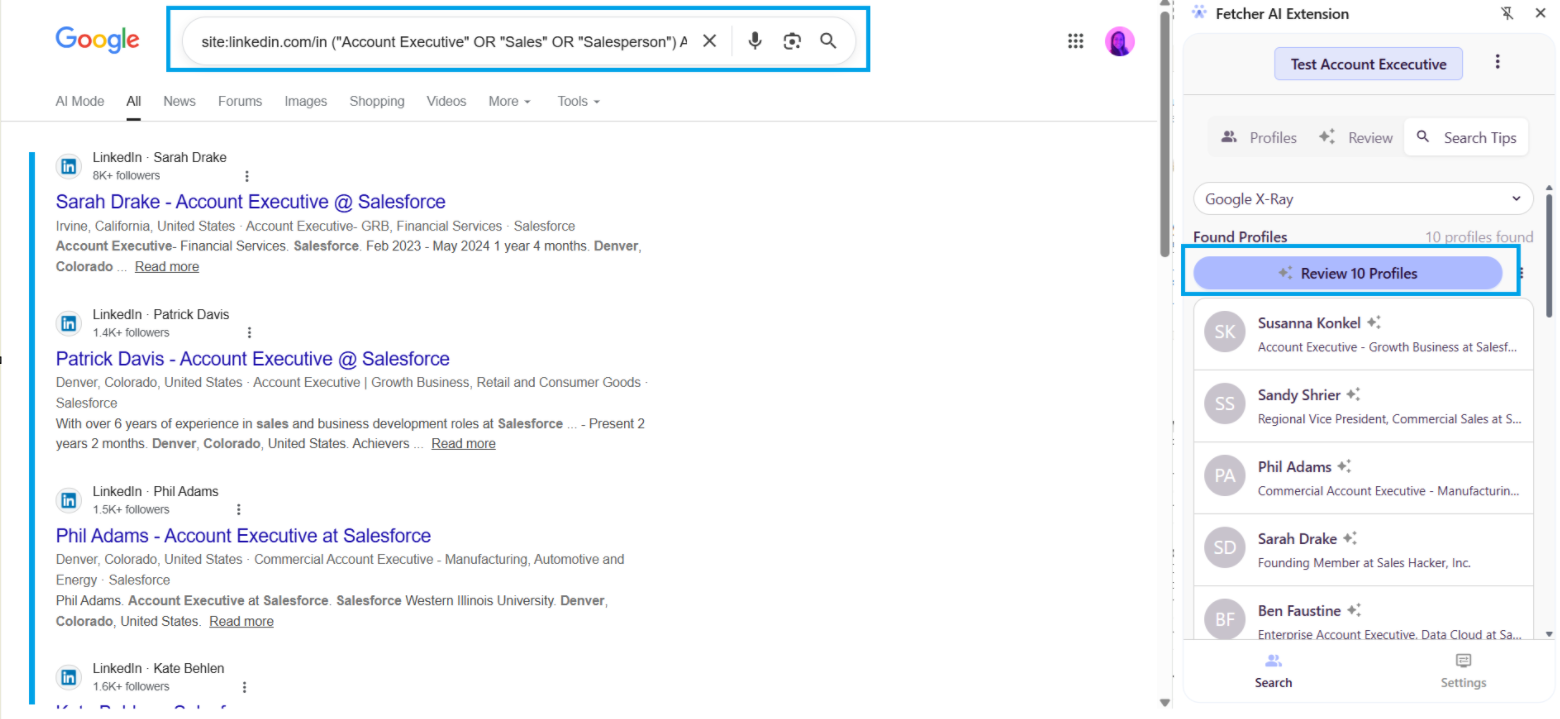
Click the open icon
Fetcher scans and surfaces candidates inside Google with the selected filter.
Review top 10 candidates at a time
Key Benefits
Faster candidate review – Evaluate multiple profiles at once
Consistent screening – AI-driven ranking based on your criteria
Improved efficiency – Reduce manual review time
Seamless workflow – Works across platform and extension
Best Practices
Ensure your sourced tabfilters are well-defined before using bulk review
Start with Strong Fit and Good Fit candidates for outreach
Use Search Tips (X-Ray) to expand your talent pool
Regularly refine your filters to improve ranking accuracy
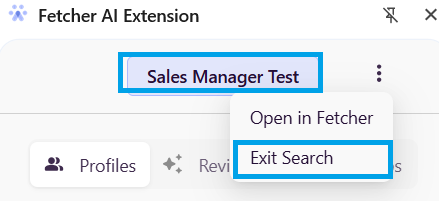
Exiting a Search
If you want to switch to adding profiles or sourcing in another search:
Click the three dots (⋯) beside the name of the current search at the top.
Select Exit Search.
You will then be able to select or create another search.
You can keep the extension open while switching between tabs; there’s no need to close it.
You can also continue sourcing outside of LinkedIn; clicking a suggested profile will automatically open the full LinkedIn profile for review.
If you make changes or switch searches, simply reload the LinkedIn page to reflect the latest updates.
If you wish to fully close the extension sidebar, click the “X” icon in the top-right corner of the extension window
Tips for Using the Extension
Always configure your Settings Tab before sourcing.
Use the Profiles Tab to quickly add candidates that align with your search criteria.
Regularly clear cached data to ensure optimal performance.
Explore all tabs to fully leverage AI recommendations, search tips, and review features.
 Updated
by
Support Team
Updated
by
Support Team